What's new

Wings3D, Help thread (NL)

A

Anonymous

Guest
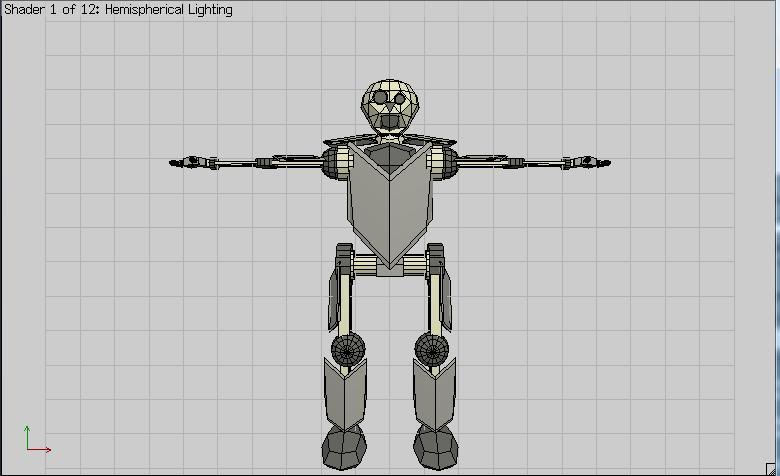
You mean that they are so bright in the directions that get sunlight on them?

Go and edit the materials and change the colouring specifications, you can darken some (I think that it's the Diffuse one) of the sliders to reduce the "glowing" of the surfaces.

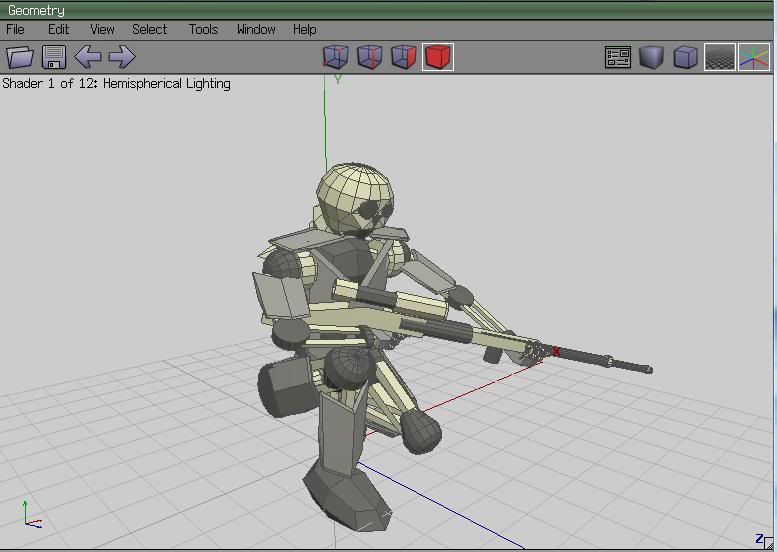
Also if you are trying to reduce the number of vertices on each segment, then you can remove 6 nodes on each arch to reduce it further... (remove the node that appear when you bevelled the edges)
 

Xpress

Strata Poster
Nope, I tried messing with the materials and got the same result each time. I even tried making my own red material and snapping it to the surfaces (after resorting them to default color) and still have the same result :(

EDIT: Nevermind, I had to flatten the extra vertical surfaces, which removed the flat top and flat sides, and gave me the result I wanted :)
 

Pokemaniac

Mountain monkey
Staff member
Administrator
Moderator
OK... let's say I have two faces, vertices, edges or objects I want to be closer to each other.

1) Is there a way to align two faces, objects, vertices or edges on a given plane, and the entire object follows without deforming? Yet better, align one object with another without moving the first one?

2) Is there a way to move objects, faces, etc closer to or further away from each other, without having to move them both independently and eyeball a lot?
 
A

Anonymous

Guest
1. Yes you can line up 2 objects by using the ".Put On." command in the "face mode".
First select the face you want to line up on the object you are going to move.
Then you go RMB menu > .Put On.
Then select the face on the object on which you want the first object to line up on.
Then press RMB to execute.

2. I'm not sure on what you mean, but Move > Normal would work on faces, Absolute > Move would work if you know exactly where you want an object, then you can always line the view up to a certain face "align to selection" and use move > Free on it to move it in a temporary coordinate system which is based on the view alone.
 

Pokemaniac

Mountain monkey
Staff member
Administrator
Moderator
Sorry to bring back an old question now, almost three weeks later.

What I meant with "moving objects closer to or further away from each other", is best explained by an example: Say you want to build a walkway into a park area, which rows of flags lined up. Say you want to have three rows of flags, one on each side of the walkway, and one down the middle (for some reason).

You make a simple flag pole, and move it into position. Then you start duplicating them along the X-axis (for instance). Then the problems start. How can you make rows two and three an equal distance away from the middle row? Is there a function that allows you to set a "middle point", which you can make multiple objects move closer to or further away from? Of course, you can duplicate all the flags, set them as one object you duplicate again, move so that there are two flagpoles on top of each other in the middle row and delete one of said rows, but that's a pain to do.
This applies to every time you want to have multiple objects in a row with equal distance from another, and want one of the objects to be in the middle. I guess I could play with the Absolute commands and some calculating, but I want to know if there is an easier way first.


Also, is it possible to import an object from one file into another? If I have a huge object in one file, and I want to put onto it some ornaments I've made in another, can I import those ornaments into the "main" file?

Thanks a lot in advance!
 

Pokemaniac

Mountain monkey
Staff member
Administrator
Moderator
Nevermind the last question, I found out. Didn't see the "merge" command earlier.

The midpoint question still stands, though, as do another one I just got:

Is there an Absolute Rotate command? A way to rotate an object a specified number of degrees clockwise or counter-clockwise, around a given axis. At least, is there a way to turn an object 90 degrees?

I hope somebody notices and answers this, and thanks a lot already!
 
A

Anonymous

Guest
Sorry for the delay...

Pokemaniac said:
Is there an Absolute Rotate command? A way to rotate an object a specified number of degrees clockwise or counter-clockwise, around a given axis. At least, is there a way to turn an object 90 degrees?
You know that you can use the "Ctrl", "Alt" and "Shift" (both alone and in combinations) to snap the movement different length, like holding down "Shift" while you move an object makes the object move 1 length unit at a time...
Same thing goes with rotation.
To see which combination gives what value or edit what values you want, go to:
EDIT > Preferences > Constraints

But if you have a specific length, degree of rotation you can always press "Tab" and enter that value (with up to 6 decimals) and then press OK/"Enter".
So for instance:
Select the object > RMB > Rotate > X > "Tab" > put in 90 > press OK/"Enter"
and you have rotated the object exactly 90 degrees counter-clockwise around the x axis.

Pokemaniac said:
What I meant with "moving objects closer to or further away from each other", is best explained by an example: Say you want to build a walkway into a park area, which rows of flags lined up. Say you want to have three rows of flags, one on each side of the walkway, and one down the middle (for some reason).

You make a simple flag pole, and move it into position. Then you start duplicating them along the X-axis (for instance). Then the problems start. How can you make rows two and three an equal distance away from the middle row? Is there a function that allows you to set a "middle point", which you can make multiple objects move closer to or further away from? Of course, you can duplicate all the flags, set them as one object you duplicate again, move so that there are two flagpoles on top of each other in the middle row and delete one of said rows, but that's a pain to do.
This applies to every time you want to have multiple objects in a row with equal distance from another, and want one of the objects to be in the middle. I guess I could play with the Absolute commands and some calculating, but I want to know if there is an easier way first.
The easiest way, and probably the only way that I know if is to as you said, do the first flag pole and then duplicate one A length units along the x-axis and then the second one -A length units along the x-axis.
Then to do the second row you select all three and duplicate all at the same time B length units along the z-axis and the third row duplicate them -B length units along the z-axis...
 

Error

Strata Poster
So, I'm trying to build a custom station, but can't figure out 3 things:

1) Coloring/textured shapes
2) Transparent (glass) shapes
3) Creating a negative object
With the last one, I'm trying to add a trench in the station by making a cylinder in it. As so:
VertigoJump1-100331040236000.jpg

I know how to do this with Bryce, but not with this. Help?
 
A

Anonymous

Guest
The first ones are pretty easy, just look at these two posts:
http://www.coasterforce.com/forums/view ... 753#456753
http://www.coasterforce.com/forums/view ... 632#503632

The second one is also easy, when you make a "material" you just change the "opacity" of that material and you will get it transparent, or you could also use the alpha channel (transparency) in a texture to create see through stuff.

The last one is harder to explain since you have to do it by hand, since Wings don't have a "boolean" operator which do it for you. But once you get the idea on how to do it it's pretty easy, but a little time consuming.
Have a look on: http://www.wings3d.com.br/paulthepuzzle ... leans.html to get the idea on how, and if you don't understand then I would try and explain it for you.
 

Pokemaniac

Mountain monkey
Staff member
Administrator
Moderator
Guess this can go here, as it has something to do with 3D models in NL.

Basically, I've just made a small robot, and I want to plop a few of them around a track (for no reason). However, due to the scale I built it in in Wings, it shows up as a 30-meter gargantuan each time I plop one. So what I'm doing is comparing it to another already-plopped robot, scaling it down, and moving it where I want to have it. Repeat.

30 times.

That is mildly annoying, and quite time-consuming. Is there any other way to scale lots of objects at the same time, or set a default scale to work for one specific object?

It's an even more PIA when I use the same robot for another track, as I have to eyeball to get the size right (I use a few instances of the same objects in several tracks, and they have to be on scale to each other).

Any help?
 
A

Anonymous

Guest
It's usually NL that screws up the scaling between from a 3D editor, so you have to deal with it (sure if you work to one specific scale then it would be perfect but I don't know that one.
So yes you have to scale the object in NL each time.

There is one way to only do the scaling once, you put all the robots on their respective location (according to the track) in one object file.

However if you don't want to do that, you want to be more flexible in your design and still get roughly the same scale in NL, then you can add a cube in the robot object (or whatever you want really, cubes are the easiest though) and scale it to a dimension that would correspond to (say) 2 meters in NL compared to the robot.
Like one length unit in wings = 1m then a cube with sides on 2 lu would equal a cube with sides of 2 meters in NL.
Export the robot with the cube.

Import the robot with the cube into NL and use the cube to scale the object against the grid.

After you got all the objects added and to scale, you just remove/hide the cube in wings and export the object again, and then you got all your robots to scale every time.

I hope that this makes sense...
 

Pokemaniac

Mountain monkey
Staff member
Administrator
Moderator
Okay, new question:

When working on mentioned robots, I have to move an awful lot of limbs to get them into different postures (fingers are especially fun). To that, I use the "Rotate to target" function. I get it to work the way I want, but there's still a point I'm curious about:

What does "Point A" and "Point B" do/mean? I get the parts with selecting rotation axis and a center of rotation, but what's Point A and B for?
 
A

Anonymous

Guest
I have no idea, it seems that they don't do anything. I could ask on the Wings3D board if you really want to know...
 

Pokemaniac

Mountain monkey
Staff member
Administrator
Moderator
Thanks and thanks again. No need to ask the forums.

Now, new question:

I know there is a "group" feature, which lets you save a group of selceted objects, but it seemingly only works for one group at a time. Yes, I'm still on with the same robots.

However, once you have to move a lot of objects at once, things get a little troublesome. Arms and hands, for instance, require a lot of selecting just for moving a single joint. The entire torso is even worse. Is it possible to select, say, each hand individually, and save the selection for both?

Oh, and here are a couple of pictures, by the way:
KappaBotFront.jpg

This is the standard "T"-position. Easy place to begin.

Sniper.jpg

However, bending it all into this position required a lot of selecting. There are 25 objects on each hand, and I had to try several different positions before I was satisfied. Don't get me started on the torso.

Is there a faster way to select an entire arm/leg/upper half of the body?
 
A

Anonymous

Guest
First of all do you use the "Combine" command to merge several objects into one? That would definitely make it easier to select parts of the body.

You can use the group thing to save selections, just select everything you want to have in a group, say one arm with hand, save it as a group, continue making groups so that you can recall the selections you need later. You can even recall several different groups by using the "Union" command for each group you want to add to the selection.

If you want to make a quick selection of a body part why not just make a "selection box" with your mouse around that part? If you are having trouble selecting all faces on an object because there is other objects in the way that you don't want to select, just select one face of the object ant press the "Face view" button several times until all segments are selected.

I really hope that you use the magnet options when you are modifying the robot, since else it will be a lot of extra work...

I absolutely love the look of them though!!


Hope I made some sense in all this...
 

Pokemaniac

Mountain monkey
Staff member
Administrator
Moderator
Thanks a lot!

Turned out I hadn't seen the real Group option before, only the "Store Selection" which obviously only works for one selection at a time.

But what are the Magnet options all about?
 
A

Anonymous

Guest
You can use magnets for several things, create parabolic arcs from a straight piece, rotate a large object around a specific point (like I did with the Screaming Swing on Tesla), etc.
It's a bit tricky to do, but once you have learned it then there is several things that will be easier to achieve with magnets.

Like in your case with the robot, I would use magnets to rotate the lower part of the arm around the elbow. Instead of rotating the arm and then move it so that it "connects" with the elbow again.

A little step by step for the underarm
1. select one "end" face on the elbow cylinder and align to selection (don't change the "camera view"), deselect everything
2. select all objects in the underarm (if you have this as a group before step one then it would be easier) and hand (in object mode)
3. choose rotate > free, while holding down the right mouse button IMPORTANT!!
4. if you have done it correctly then the selection should get more "pinkish"
5. select the "end" face of the cylinder that you aligned
6. you will get a blue dot on the face you selected, click the RMB to execute
7. now rotate to the angle you want, LMB to apply, RMB to cancel

on step 1, you need to do this if you are using the free direction of rotation (you can also align to an edge or node), since that rotate in the plane of which the camera is facing, if you are rotating around x,y,z skip this step.
on step 5, you can select a single point or edge to have as your point on which you rotate around.

Have a look at: http://www.wings3d.com.br/paulthepuzzles/aamagnets.html
for more info.
 

Pokemaniac

Mountain monkey
Staff member
Administrator
Moderator
^That looks a lot more tricky than simply use "Rotate to Target", especially as most of the joints are cylinders.

Though, making parabolics sounds like a useful application.
 
A

Anonymous

Guest
^ Looks like it's the same thing. Seems like I have learned something today...
 
Top